Showing posts with label onions. Show all posts

Thursday, January 4, 2018

Whole30 Italian Beef Stew

Did you know it's national soup month?  No other month like January makes you yearn for soups and stews like this one does.  Cold weather has drastically hit the US in unprecedented ways.  Our north has temperatures in the negatives and fellow ranchers are having to literally use axes to cut through the ice to get water to their livestock.  God love and keep both them and their livestock safe.

So, as we try to warm up, stews or soup are natural meals to serve because it makes huge batches, can easily be warmed up, taste better always the next day and is Whole30 compliant!

At our ranch we love our beef and we love, love zucchini.  Each summer we grow a huge garden and lots and lots of zucchini that I used in tons of my recipes here on The Ranch Kitchen.

As we created and ate delicious meals the entire month of our Whole30 journey, this soup was another hit on our ranch. My husband and father really enjoyed it and it was absolutely fabulous to take for lunch on the few cold days we had in December.  The addition of the Italian Seasoning makes this stew smell and taste amazing too.


You'll want to use a large stock or soup pot for this recipe.  It is also easy to double this recipe if you want to even freeze some of it for a week or day later on the Whole30 when you need something to eat when life gets in the way.  This recipe however makes one large pot of stew.

To start, chop one onion, bell pepper and garlic and set aside.  I used red bell peppers that gave this stew a natural sweetness.

Brown your ground beef with the onion, bell peppers and garlic and remove any excess liquid.  Add in Whole30 compliant canned tomatoes (so sugar added) and your vegetables, seasonings and Yukon Gold Potatoes and water.  Again, we have become huge Natural Grocers fans and you can find tons of Whole30 compliant foods and condiments at their store.

Bring stew to a boil and reduce to a low simmer (low boil).  You'll cook this until the potatoes and zucchini are tender.  I promise you that the aroma is wonderful and you will find it hard not to sneak a bite or two as you make this wonderful Whole30 Italian Beef Stew!

Cooks note:  You can also use ground turkey or pork in this recipe if beef is not your choice.

                             ***************************

We hope you enjoy this recipe along with all the others we are posting to The Ranch Kitchen site.  By now for those of you that started on the Whole30 on New Year's Day you are 3 to 4 days in.  You are probably wondering just why did I do this?  I'm having to cook a ton and my grocery bill is a little high.  But, consider these facts...  You are eating healthier, learning how to cook foods that you can and will eat the rest of your life, and most of all will feel better.

I can remember after Week 1 of the Whole30 the dramatic difference in my gut health and energy.  I had fewer breakouts from adult acne and my joints were not bothering me near as much. For me those few things were enough to keep me motivated. Plus, my daughter and motivator Bethany made the Whole30 program fun and we challenged each other daily to stay strict and not drink that glass of wine my husband would taunt me with lovingly at nights!

You CAN do this. You are already a few days in or gearing up to change your life for the better! Whole30 will help you feel better, look better and make healthier choices as to what you place in your body. As a food blogger, it's given me a boot kick in the rear to blog more and post more recipes, but most of all be a healthier influence on my daughters.

As for my husband Scott...he's another case.  However, he did lose five pounds just following Whole30 at night.  I'd like to think had he really dug down and been strict, he would have done even better.  Men...but when they really try, they can trim down faster than we ever can!

Happy Week 1 of your Whole30 adventure!  Stay strong, plan and prep your meals and make them fun.  You'll be truer to the program if you make it fun and remember that there are things in life much harder than this. You don't have to eat that tortilla chip, cookie or bread.  You are already on your way.  Don't get sidetracked.

As always, all recipes can be shared by email, pinned to your Pinterest board and copied off to use as an ingredient and recipe list to help you out. To keep seeing my blog post, please like my post on my The Ranch Kitchen Facebook and Instagram this keeps you up to date as we place new tips on the our site.

Try this hearty Whole30 Italian Beef Stew!  You will love it and so will you family.

Alise and Bethany


Monday, August 1, 2016

Summer Vegetable Tian Via Ilissa and Pinterest


Our Lissa (Ilissa) as we call her is becoming a good cook in her own right.  She's a big girl now with her first job and living in the big city, she has started, as her traveling permits, to cook when inspiration or an event calls for it. Her recent Pinterest (www Pinterst.com) feed find resulted in this healthy dish.  Our family loves zucchini, squash, onions and potatoes, so this dish naturally marries the four. I think her picture below speaks for itself. She sent me the before and after.  
She now has the honor of making this when she come home for dinner during our county festival. Proud of you Ilissa!  Your family won't starve one day and you and Bethany can carry on the The Ranch Kitchen blog!!  Hugs! 
The recipe hails from the site Budget Bytes via Pinterest http://www.budgetbytes.com/2011/08/summer-vegetable-tian/.  If you want to know exactly how much the approximate cost for a dish like this is, this site will spell it out for you.  

Summer Vegetable Tian 
By Budget Bytes

Ingredients
  • 1 Tbsp olive oil
  • 1 medium yellow onion 
  • 1 tsp minced garlic 
  • 1 medium zucchini 
  • 1 medium yellow squash 
  • 1 medium potato 
  • 1 medium tomato 
  • 1 tsp dried thyme 
  • to taste salt & pepper 
  • 1 cup shredded Italian cheese 
Instructions
  1. Preheat the oven to 400 degrees. Finely dice the onion and mince the garlic. Saute both in a skillet with olive oil until softened (about five minutes).
  2. While the onion and garlic are sauteing, thinly slice the rest of the vegetables.
  3. Spray the inside of an 8×8 square or round baking dish with non-stick spray. Spread the softened onion and garlic in the bottom of the dish. Place the thinly sliced vegetables in the baking dish vertically, in an alternating pattern. Sprinkle generously with salt, pepper, and thyme.
  4. Cover the dish with foil and bake for 30 minutes. Remove the foil, top with cheese and bake for another 15-20 minutes or until the cheese is golden brown.
Get cooking,

From Ilissa!


Wednesday, September 23, 2015

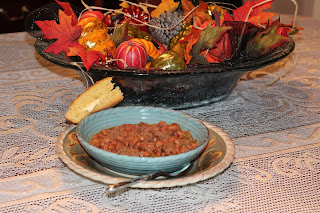
Cowboy Beans

Cowboy Beans

It's the first day of fall and nothing says cooler weather more than a big bowl of pinto beans simmering on the stove.

This past weekend, on our thankfully lazy Sunday afternoon, I cooked a dish we all grew up with around my house called Cowboy Beans.  This dish was made famous by my mom because anytime she placed the word cowboy in front of a dish, my brothers would eat it up and so would I. 

The name just sounded rough and tough....something surely we should eat and always did.  Moms of little, rowdy boys like my brothers have to learn what works and naming her food seemed to do the trick.


Pinto beans are one of those one pot meals that you can make and allow to cook all afternoon.  The pinto beans in this recipe had not been presoaked the night before to tenderize the beans. Just follow the directions on the back of your beans package for the 'quick cooking' method.  However, if you do presoak your pinto beans you will reduce your cooking time by half.

You may chose to use your pressure or slow cooker to make this dish even easier.  Just follow their cooking directions for similar recipes.

Adding ground beef, pork, or turkey to these pinto beans makes this a meal chalked full of extra protein.  I baked some homemade cornbread with a square pat of real butter making us all pretty content and full by that evening.  You can get a recipe for my Jumbo Mexican Cornbread here, but I'd cut the recipe down by 3/4 as this recipe is for a huge crowd!  Of course you can always freeze the cornbread. 

Click here on the link for our Cowboy Beans to get the recipe where you can copy, share by email or to save in your files. 


This recipe can be served on top of rice and is always better the second day when the flavors seem to continue to improve.  Reheat Cowboy Beans on your stove or in your microwave oven the next day. 

We hope you'll enjoy this simple dish that is a family favorite on our ranch and a favorite of my childhood.  It's one of my husband's favorites that we cook all fall and winter long. 


         Alise - The Ranch Kitchen


Tuesday, November 18, 2014

'Sure Is The Best Broccoli Rice Casserole' and November Sure Champ Recipes From the Ranch Blog Post


Thanksgiving is right around the corner and my mother and I are starting to think about our family meal.  It's always a huge effort to cook for our growing family and certain dishes are traditions each year. 
 
This year, as in the past, I will cook my newest recipe for 'Sure Is The Best' Broccoli Rice Casserole.  This recipe was recently posted on the Sure Champ November Blog Post along with some other favorite holiday favorites from around our ranch. 

Click here for the November Sure Champ Recipes from the Ranch Blog post. 


This cheesy rice dish with broccoli and onions is one of my husbands favorite sides and usually a part of his birthday dinner.  It's a southern staple dish at holiday dinners. 
 
For this recipe I switched from the jar of processed cheese to 1/2 lb. of Velvetta and liked the difference it made.  I usually use more cream of mushroom soup and felt that only one can was needed.  Instead of frozen broccoli, I used fresh and chopped them finely.  I also used sweet white onions, instead of the harsher (eye tearing) white cooking onions.  You could leave the onions out, but I think it's a huge part of this dish. 
 
Once your rice is cooked, throwing this casserole together is easy.  I've also included with this recipe how to cook the perfect rice.  I thank my mom for that huge lesson.

It's great to have as the next day as leftovers or to send home with family.  A lot of the time I put the casserole together, cover tightly with foil, and do the final baking the day of Thanksgiving (or Christmas & Easter) to help take some stress away from my day.
 

You can also click here for the recipe for 'Sure Is The Best Broccoli Rice Casserole'

 
Hope you enjoy it as much as we do! 
 
Alise  - The Ranch Kitchen

Thursday, July 24, 2014

Company Potatoes


Inspiration can come from anywhere, anytime and anyone.  This recipe today came from Good Shepherd Medical Center's cafeteria probably about fifteen years ago.  You'll probably think why post this recipe as it's so simple?  However, I find I get in a rut sometimes and when I see a simple recipe my 'light' turns on. 

Back then I boiled a lot of red potatoes with lots of butter. I don't do that now and their variation I think is healthier than mine and one I serve often for friends who come to dinner. 

I usually use green onions with the tops chopped in this potato dish as I like the color.  But not having any the other night, I improvised and used our garden 1015 Texas A&M sweet onions. 

So here's my recipe to Company Potatoes.  No more boring boiled red potatoes for my family or yours! 

Alise - The Ranch Kitchen
 

Sunday, June 8, 2014

My first official 'Share A Recipe" off my theranchkitchen.com new site for Craig's UnKabobs


Logged on my new sister site www.theranchkitchen.com and what did I find??  My first official submission for my 'Share A Recipe' tab off my new site!  I was so excited that I made it the first chance I had and it was amazing!  We really enjoyed it with our fresh squash from our garden! 

Below you'll find the recipe and the above picture is one I took as one was not submitted with it!  I hope you'll stop by and create an account on my site and share your families tried and true recipes with my site! We can all benefit from it just like my family did the other night! Craig's UnKabobs were the perfect meal on our Friday night and I know you or your family would enjoy them as well!   

Thanks Craig, whoever you are for taking the time to register on my site and share a recipe with The Ranch Kitchen and me!  It's a wonderful recipe that will now be something I make for my family or for a crowd like you advised!  He says he combined these flavors for Kabob flavor without all the work. But you'll notice I put mine on skewers and kabob'ed them as I had some help from my youngest cook who wanted them on sticks as she called them.  Either way is good and I think I like Craig's idea the very best! And I actually used the beer I had on hand that was a Bud Light with Lime...I thought the lime would be a good fit in the marinade!  Thanks again Craig! And anyone that submits a recipe could be featured not only on my site but on my blog as well!  Hint, hint Kim....Laura....Cindy....Bethany...and Ilissa....

Craig's UnKabobs

1 lb. sirloin steak, cut in 2 inch cubes
1 lb. smoked sausage (we use Hillshire Farms), cut into 1 inch slices
1 lb. boneless skinless chicken breasts, cubed
1 can beer (can use broth if you prefer
3 medium bell peppers (I use a mix of yellow, orange, red)
1 large onion, cut in chunks
8 ounce container of baby Bella mushroom, halved
1 medium zucchini, sliced into 1/2 inch slices
1 medium yellow summer squash, sliced in 1/2 inch slices
16 ounce jar of honey teriyaki marinade

Allow 2-12 hours to marinate steak and chicken for best flavor.

In a large, heavy duty zip-top bag, add the cubed steak and steakhouse marinade. Add about 1/2 can of beer to marinade bottle to "get all the good", shake gently and add to zip-top bag with steak.

In a 2nd large, heavy duty zip-top bog, add the cubed chicken and honey teriyaki marinade. Add remaining beer to marinade bottle, shake gently and add to zip-top bag with chicken.

Bring griddle to med/high temperature on grill. Add a little olive oil and stir fry a combo of all ingredients in small batches. We keep a foil pan on the cooler side of the grill and, as ingredients are "just done", we move to the foil pan to stay warm. Warning - a crowd WILL gather here with forks ready!

We occasionally add shrimp but have found it best to cook in a separate small cast iron skillet to avoid transfer of flavor for those who don't care for the shrimp flavor. We have made these for as many as 150 at a family reunion and a wedding rehearsal dinner - best to use two grills if cooking for this many (one for actually cooking and one for warming/serving).

Craig - Friend of TRK!

To see the post on my new site, please go to Craig's UnKabobs


Sunday, April 27, 2014

My Girls Favorite Squash


At least once while my girls are in, I MUST make this easy squash side vegetable dish that is always their most requested healthy dish.  Thank goodness they are calorie conscious, and I am getting more so with age.  This recipe can be seasoned with any seasoning really, but we prefer Tony Chachere's Creole Seasoning, or occasionally lemon pepper and garlic salt.  With 1/4 cup Canola oil and a chopped onion, these zucchini and yellow squash are an excellent side that sometimes gets a sprinkle of Parmesan cheese as an added bonus!
 
 
My Girls Favorite Squash
 
 
4 yellow squash. sliced in 1/4 inch circles
4 zucchini squash, sliced in 1/4 inch circles
1 onion, chopped in large chunks
1/4 cup Canola Oil, vegetable, grapeseed, or olive oil
2 teaspoons Tony Chachere's Creole Seasoning or you can use 1 teaspoon garlic salt with 1 teaspoon lemon pepper instead.  Truly - season to your liking.
 
 
Prepare squash and onions.  Pour 1/4 cup oil in a Teflon coated pan with stove top turned to medium high heat.  Add squash and onions cooking for five minutes while stirring occasionally.  Add seasoning and continue cooking on medium and then low heat as your vegetables start to cook through. I usually cook this uncovered, but when I am in a hurry covering your pan with it's lid will speed up the process!
 
***We love, love this simple, low calorie squash dish probably once a week in the summer when it's in overabundance in our garden!  It is great to make in large batches and have for leftovers for the next days meals.  I usually cook this in my large Teflon coated wok.
 
Alise  


 ***This was lunch today for my girls that consisted of my Stuffed Jalapeno and Cheese Chicken and pasta.  I used nacho jalapeno's for this chicken dish as I was out of my usual favorite of pickled jalapenos, carrots, and onions.  When you live in the country...you don't just run to town!

Enjoy!

Tuesday, March 11, 2014

The Ranch Kitchen's Country Pot Roast


Sundays afternoons are pretty special to us.  It's our time to unwind and get ready for the week ahead.  It's a slower moving day that is pretty well needed after the fast and furious weeks we have. 

Lunch or supper are usually bigger productions than our usual meal during the week.  If we cook lunch, then I make sure to have enough for leftovers that night and vice versa for the next days meal on Monday.

Sunday afternoons are usually spent at our barn working the heifers, in our garden, or fishing in our ponds.  And some times it's just catching up with the family and grandparents or paying them a visit.  I can remember Sundays being the day we always went to my grandfathers and played Spite and Malice.  We'd play for hours and always had the best time.  He'd usually surprise us with a watermelon or my step-grandmother would have a fabulous dessert to eat or cooked a big lunch. 

This past weekend I cooked a large pot roast with vegetables that was right up there with the best of the meals I've cooked most recently.  The cut of the beef was the most important factor in making this pot roast. You must always make sure when you can to choose a roast to make sure it's a 'select or prime grade' of beef that has the USDA (US Department of Agriculture) shield on the package label.  Many meat markets can fool you with a labeling of choice or prime.  If it doesn't have the USDA label, you simply are taking a risk at purchasing a lesser cut of meat thereby cooking one tough roast.  I've sadly made this mistake before and it's really disappointing to sit down to a great looking meat that is as tough as a piece of leather strap to eat! 

For more information on great cuts of beef I have linked three sources below that has a wealth of information. 

Certified Hereford Beef  - What we proudly raise and serve our family!
http://www.herefordbeef.net/

Prime Steakhouses - great information on all cuts of high grade beef! 
http://www.primesteakhouses.com/how-usda-grades-beef.html

Follow this link for the USDA's recommendations for safe temperatures for beef .
http://www.fsis.usda.gov/wps/portal/fsis/topics/food-safety-education/get-answers/food-safety-fact-sheets/safe-food-handling/safe-minimum-internal-temperature-chart/ct_index


I cooked this roast in my large Le Creuset 5 1/2 quart round French Oven that Scott got me one year for Christmas.  He told me after he choked on the price that I'd better use it A LOT!  I can safely say we have and it was well worth the price and he has reaped the benefits from it. 

Honestly, you can use any type of pan to cook a roast in though.  I've used large metal pans from the grocery store, wrapping several roast together when cooking for large crowds.  And I've used glass baking dishes like the Pyrex 13 x 9 brand rectangular dishes wrapped with foil as well.  Although I didn't use foil of course with my Le Creuset, I highly suggest it with the metal pans and Pyrex as it makes cleanup so much easier. 

In discussing this recipe with my mom, she reminded me how she always put green bell peppers in her pot roast along with the other vegetables.  I know that would make it even better and the smell coming out your oven would be even better! 

Many people braise their roast before that place the vegetable on top or in the oven to cook.  Braising is simply cooking the roast on a medium high heat to seal in the juices.  I, however have rarely done that and find my roast are still great by simply roasting it.

This roast took right at 2 1/2 hours to cook.  It's perfect meal to place in your oven when you have other things to do on a Sunday afternoon!

***I laughed out loud at my husband as he walked in as I was taking pictures of our meal (my girls are now used to me taking pictures of food - all the time) As he walked in he was like,  "that's not my plate is it?!"  He thought the large roast picture at the top of this post was his plate! 


The Ranch Kitchen's Country Pot Roast

1 large Prime or Select Beef Chuck Roast
2 onions, sliced and quartered
8 - 10 red potatoes, quartered
8 carrots, cleaned and chopped 2 inch sections
1 package of brown gravy mix, powdered
4 tbsp. Tony Chachere's Spice N' Herb Seasoning  http://shop.tonychachere.com/spice-n-herb-seasoning-5-oz-p-21722.html
1 tbsp. Original Mixed-Up Pepper Marinade & Seasoning by Jane's Krazy Mixed Up Seasonings

***chopped celery, green bell peppers would be great additions to this roast.

Place roast in your pot seasoning generously with Tony Chachere's Spice N' Herb Seasoning and Jane's Krazy Original Mixed-Up Pepper Marinade.  I used the Spice N' Herb to the point that it's covers every square inch of the meat.  Gently pepper the roast with the Mixed-Up Pepper Marinade.

Place cubed potatoes, carrots, and onions in layers on top of your roast.  Top with package of brown gravy powdered mix on top of vegetables.  This will steam and cook along with your roast and vegetables and help you have the most amazing pan juices! 

Gently against the side of your pot pour in enough water (about 3 - 4 cups) to come up the sides of your roast and pan by 3/4.  Place  the roast in an oven that has been preheated to 350 - 375 degrees for 2 1/2 hours.   I usually cook a little higher than most in my oven at 375 degrees.  We personally like our roast cooked to a internal temperature of 165 degrees if you use a thermometer or when sliced it has a slight pink center. 

Place your lid on your roast and go have some fun!  In 2 1/2 hours you'll have a great meal that will smell heavenly as you go about your afternoon of relaxation. 

***Make sure that before you slice your roast that you allow it to sit for at least five minutes so that the juices can 'seal' in your meat and not all run out. This is a really important step. 

I like to serve my pot roast with a side salad, fresh purple hull peas, and bread of some kind. 

 
Scott's plate!


Country Pot Roast Leftover Stew


Quick Recipe:
 

Sometimes I'll take my left over roast, shred it, and along with the left over vegetables make a quick stew the next day.  I'll add one can each of beef broth, drained whole kernel corn, green beans, Lima beans, juice left in can stewed tomatoes, extra seasoning, an extra onion, and couple of cups of water. Bring it all to a boil and another great dinner is on the table in no time! 


Enjoy! 

Alise @ The Ranch Kitchen


Saturday, March 8, 2014

The Lost Art of Cooking Meatloaf!


Yes.  I think making meatloaf is considered one of those recipes that is dying out on American tables.  Too few people consider this an easy meal to make and with the misconceptions about beef and all the great lean cuts that are out there, meatloaf is a great protein packed meal to prepare!   Honestly it's suffered and it couldn't be anything but easy to make. Leftovers are even better and if you've never had a meatloaf sandwich then well, you're missing out!

So, last night, I prepared on of my husbands favorite, which is really my mom's rendition of her homemaking teacher's Mrs. Bonnie Rob's meatloaf back from 1960's. To me nothing says Sunday night at home than meatloaf, mashed potatoes, and purple hull peas we shelled from the summer before. 

You'll find the recipe below has most everything that you'll find in your refrigerator or pantry.  I get creative sometimes with my seasoning and God knows I love my Tony Chachere's Creole Seasoning, but I've discovered a new pepper seasoning called Jane's Kazu Original Mixed-Up Pepper Marinade and Seasoning.  It's so, so good!  You have to try it! Great on steaks and especially in this meatloaf!

I like to bake my meatloaf until well - well done.  So you'll see a slight burnt crust to mine from the combination of the extra cooking time and ketchup on top because sometimes it's how momma likes it that hits the table! 


Mom's Homemaking Class Meatloaf

4 lbs. ground hamburger meat, not totally lean
1  - 2 onions, chopped (we love onions so I use 2)
1 green bell pepper, chopped
4 eggs, beaten
2 tsp. steak seasoning or salt and pepper to taste
1 cup ketchup for inside meatloaf
1/2 cup for the top of meatloaf
1/4 cup Worcestershire Sauce
10 sliced of day old bread, crumbled up by hand or shredded by hand.

In a large bowl place hamburger meat, chopped onion, bell pepper, three beaten eggs, ketchup and Worcestershire Sauce. Blend well by hand (take off your rings or they'll get messy).  Once your meat mixture is together well, add the crumbled bread and seasonings continuing to blend together by hand.  You do not want to work with the meat too much as it can make it tough after it's cooked.  Blend until the meat and bread are together well. 

Place the meat loaf mixture in a 9 x 13 inch Pyrex dish that has non-stick foil or has been sprayed with cooking oil like Pam Cooking Spray.  You'll want to do this as the cleanup can be a complete mess if you don't! 

Bake at 375 degrees for 1 1/2 hours or until meatloaf has no remaining pink. You can use a meat thermometer and the recommended degrees for this is 145 - 164 degrees when it is stuck in the center.  Remember that the thicker your meatloaf is, the longer it will take to cook.  That is why I like to cook mine in a 9 x 13 inch Pyrex dish.

And one last note!  Certified Hereford Beef or CHB as we call it is the best beef to use with this recipe!  After a day at a cattle sale I thought it appropriate to make sure this recipe got on my site!  Enjoy!

Alise @ The Ranch Kitchen!

Sunday, March 2, 2014

New Years Eve Onion Swiss Cheese Bake

**** This is from an old post that I guess I never posted!  LOL!  This Vidalia Onion and Swiss Cheese Bake is really good...but the post is a year old....gotta love blogging and random post I didn't know I pushed.

**********************From New Years 2012*************************

As I have aged, New Years Eve has taken on a new perspective.  It is no longer about the huge parties, up all night and waking up late the next day.  It's now more about family, friends, and a quiet, nice get together at home where we eat too much, visit, watch the ball drop on the t.v. and the little ones play, and check in on our girls who are out enjoying their evening like we did for so many years.  This year will be no different.  I honestly think I am more excited about this new year than I have been in many years. With my oldest daughter graduated with her masters and determining her future, my middle daughter now classified as a junior at Texas A&M, our 'baby' now a fifth grader, my great job with fantastic administrators, teachers and staff, the great ladies I now serve with on the National Hereford Women board, my sweet husband, and our ranch, life hasn't slowed down and we are excited to see where life takes us all in this new year.  Blessings have been many in our lives and we are very, very thankful to God for his many gifts.

Just this past month I prepared a dish that I think is the perfect pairing with beef.  And if you read my blog...you know we love our Hereford beef on our ranch.  My husband also loves Swiss Cheese more than any thing else I think on this planet.  So with the Vidalia Onions we love and Swiss Cheese, we had the perfect combination of flavors that everyone really enjoyed.  My blogging has taken a back seat recently to my busy life and one of my resolutions for the new year is to post more in the next year and put a few more lower calorie versions or adaptions on the recipes I post.

I hope you'll try this new dish that we all now love.  Preparation time was a bare minimum and I can't wait to try this with steak on the grill or on the side of brisket.  And I have to give credit, where credit is due as I got this recipe off of a new site I found called Instructables.com and they call it Cheesy Onion Casserole.  


Vidalia Onion and Swiss Cheese Bake

Ingredients:

2-3 Tbs butter or margarine
3 large sweet onions or 4 medium white or yellow onions
2 c. shredded Swiss cheese (8 oz.)
1 can cream of chicken soup, undiluted**
2/3 c. milk
1 tsp. soy sauce
8 or so slices of French bread       

Slice onions and try not to cry. With this many onions, its hard.

Melt butter in a saute pan over medium heat, and add onions. Saute onions until clear, a little brown is ok. In a shallow 2 qt. casserole pan, layer onions, 2/3 of cheese and pepper to taste.    

Assemble Casserole

Melt butter in a saute pan over medium heat, and add onions. Saute onions until clear, a little brown is ok. In a shallow 2 qt. casserole pan, layer onions, 2/3 of cheese and pepper to taste.  In a sauce pan, heat soup, milk, and soy sauce, stirring to blend. Pour soup mixture in a casserole and stir gently to mix. Top with bread slices. 

Bake at 350 uncovered for 15 minutes. After 15 minutes, top of bread should be nice and toasted.  Push bread slices under the sauce and top with the remaining cheese.

Finish Baking and Eat!

Place casserole back in oven and finish baking for 15 more minutes. 

Total prep time: 20 minutes.  
Total baking time: 30 minutes. 


Green Chili Sausage and Egg Casserole


Green Chili Sausage and Egg Casserole
 
At our school we enjoy eating.  Our visiting staff members, those that travel from campus to campus in our little small district say we eat better than the others and I agree! Our breakfast are probably one of my favorite meals we do.   Today I want to share with you a quick and easy egg dish that I prepared in a hurry at the break of dawn so that it would be piping hot and ready as soon as I got to school. 
 
This is my Green Chili Sausage and Egg Casserole and you probably have most ingredients in your pantry right now.  If you don't have the green chili's, you can omit them, but I do think it makes this casserole better than one without it.  If I have fresh (garden grown) green chili's or peppers that are sweet, I chop them in my mini food processor and use those instead of the canned variety.  With a good Greek Seasoning or my Tony Chachere's Creole Spice this egg dish turns out perfect every time.  It's great served as left overs for up to three days and you could even freeze individual servings in freezer bags and reheat later for up to 3 months.
 
Green Chili Sausage and Egg Casserole
 
12 eggs, beaten
1 large can of chopped green chili's, 6 ounce or larger
1 onion, chopped; white or yellow or even red is great (optional)
2 lbs. ground sausage, browned and drained
1 cup evaporated milk, or whole milk
2 teaspoons of Tony Chachere's Creole Seasoning
2 cups shredded sharp cheddar cheese ( reserve one cup for the top of your casserole or mix it in to your casserole - either way is good)
 
Brown sausage and drain all grease off. Cook sausage to just pink in color (medium well done).  Beat eggs and set aside.  Add evaporated milk or whole milk and blend.  Chop onion.  In a large bowl mix together eggs, seasoning, then green chili's and onions.  Add cheddar cheese to egg mixture.  Last add sausage mixing well.   Pour egg mixture into a prepared 9 x 13 inch Pyrex dish or baking dish that has been sprayed with Pam cooking spray/oil.  You may also just grease your dish with cooking oil so that it does not stick when you are cooking it.  Bake at 400 degrees for 35 minutes or until mixture is done when you place a toothpick or fork in the middle and eggs are set and not runny.  Sprinkle additional cheese on top and allow to melt.  Cut into squares and eat! 
 
These are great as leftovers and this is a dish I cook at night when we have breakfast for dinner. 
 
Enjoy!
 
Alise @ The Ranch Kitchen


Wednesday, October 2, 2013

Pork Roast with Onions


Truly one of my very favorite Sunday suppers to make is a beef or pork roast.  It's a simple, throw it in the oven dinner, with little to minimal prep time.  I can run to the barn, work in my yard, or just take a nap and it's done in under a few hours in my oven...(in other words I'm not standing over an oven frying pork chops).  

This pork roast I share with you today takes a little extra time by adding some sliced onions, but the end results is a flavorful roast that you can eat on for days and transform in to many other recipes throughout your week ahead.

Suggestions to reuse this pork roast are suggestions like my King Ranch Pork Enchilada's (on the recipe tab above this page), and used as the meat inside a box of Tony Chachere's Jambalaya Mix for a quick meal when momma is tired and dinner is faster at home than at a restaurant!

I used my traditional foil pack as you'll see in the picture above, because #1, I'm lazy and don't like to clean a roast pan, and #2, I'm lazy and don't want to feel life is just too short to clean a roast pan!  So, with that said...try this recipe and use the foil!  

I also baked some sweet potatoes or yams on a foil lined cookie sheet, tip ends cut off sprayed with oil along side my pork roast in the oven.  Yams are cooked when you can gently squeeze them and they give.  Hope that makes sense and please don't burn yourself squeezing too hard or without oven mitts! :o)


Pork Roast with Onions


One large pork roast (pork shoulder, butt, or loin)
4 large onions (two if you just have too), sliced in 1 inch slivers
4 cups water
garlic powder, salt and pepper to taste or  omit first three spices and use Tony Chachere's  Creole Seasoning
foil
Pam 'Oil' Spray

Heat oven to 400 degrees.  I use a convection oven that I love for even cooking.  Line a large baking dish with foil that has been sprayed with Pam Spray.  Place roast that has been seasoned liberally with garlic powder, salt and pepper or Tony Chachere's Creole Seasoning.  Place roast with the fat side up.  Cover with onions and gently pour water on all sides of the roast.  Cover tightly with foil that has been sprayed with Pam bringing both sides together folding upward.  Place in the oven and cook for 1 1/2 to 3 hours depending on size of your roast.  For a 2 - 3 pound roast, I'd cook for 1 1/2 hours.  My roast last night was a 4 pounder and took 3 1/2 hours to cook.  For the last 30 minutes I uncovered the roast and cut slits on top if it to quicken my cooking time. My reason for this last step was that I got over zealous and bought a roast that was entirely too big! :o)

Be careful when you open the foil as the steam will easily burn you!  Once you take out the roast, allow it to sit for ten minutes before cutting it as this allows the juices to set up and keep it moist!

Slice or pull pork from the bone and serve along side your baked sweet potatoes (directions above), my Unbundled Green Beans here on this site under recipes, and some rolls.
Be careful when you open the foil as the steam will easily burn you!  Spoon the drippings or juice from the roast over your pork for added flavor and don't forget the onions as that is the best part!  My husband likes to add Tabasco Sauce on top of his pork roast!

You can also cook your yams/sweet potatoes beside your pork in the same roasting pan and it is fantastic.  My roast was just so big last night that I did not have room to add the yams!

Enjoy!

Alise @ The Ranch Kitchen


Wednesday, August 28, 2013

Marinated Cucumbers and Onions

                                    
I think I could sometimes just drink this recipe!  As far back as I can remember my mom made this side dish.  It was always just what we all wanted. She probably didn't use as much sugar as I do and you can most certainly adjust any ingredient or spice below to your liking.

My recipe below is my rendition of her cucumber recipe.  It's fun just to experiment and make it your own. It makes my mouth water just thinking about it.  On a hot summer's day there is nothing more refreshing than this recipe to me. 

So, try this out this week. It's an easy enough dish that even the most inexperienced cook can prepare and wow their families and friends with!  


                                                    Marinated Cucumbers and Onions

3 - 4 cucumbers (seedless variety are best, but we usually don't use it)
2 onions sliced, white or red
1/2 cup sugar or non calorie sweetener like Splenda
3 cups cold water
2 cups white or apple cider vinegar (I usually use white vinegar)
2 teaspoons Italian Seasoning spice
1 teaspoon garlic salt
Pepper to taste
Tony Chachere's Creole Seasoning (a little - 1 tsp. goes a long way)

Optional additions:

bell peppers, sliced in 1/2 inch strips
sweet banana peppers, chopped in bite sized portions (one inch in size)
tomatoes, cherry or Roma tomato varieties
dill weed, fresh or dried 

Preparation:

Clean and slice cumcumbers and onions in to 1/4 inch wide rounds.  Place in a large container with a lid or a large bowl. Add other vegetables, water, sugar, vinegar, and seasonings. Allow to marinate in the refrigerator for at least two hours or longer. I prefer overnight.  

We enjoy taking these cucumbers out at each night as a side with dinner.  They will keep for one week.

***Throughout the week we add more cucumbers and onions as they are eaten.  

To us this is one of our favorite things to eat out of our garden.  It's light, quick and easy to make!  

Enjoy!

Alise